Teacher Appreciation Week

Teacher Appreciation week is Monday, May 8 through Friday, May 12. National Teacher Day is May 9. Show your appreciation with one of these fun and simple flowering gifts.


Thank you for helping me grow – Shanty 2 Chic

Thanks for helping me bloom – Skip to My Lou

Ruler planter with “you rule” pencil tag – Tilly’s Nest

Painted flower pot – My Happy Place

“I totally dig” summer planter – Bren Did

Thanks for helping me grow – Three Kids and a Fish

You were mint to teach – Such the Spot

Thanks a bunch for all you do – Simply Kierste

Teacher Appreciation Week

Mint Julep Brownies

mint-julep-brownies-12.jpg
Ingredients
  • 1 cup butter
  • 4 ounces unsweetened chocolate, chopped
  • 2 cups sugar
  • ¼ cup fresh mint leaves (I used about 8 leaves)
  • 4 large eggs
  • 1½ cups flour
  • ½ teaspoon salt
  • 2 tablespoons bourbon
Frosting
  • 4 ounces unsweetened chocolate, chopped
  • 1 stick butter, softened
  • 3½ cups confectioners’ sugar
  • 3-4 tablespoons milk
  • 1 teaspoon vanilla extract
  • ¼ teaspoon salt

Instructions

  1. Preheat oven to 350 degrees.
  2. Place 1 cup (2 sticks) butter and chopped chocolate in a medium heavy-bottomed saucepan. Heat over low heat, stirring frequently, until both butter and chocolate are melted. Set aside and let cool for about 5 minutes.
  3. Combine sugar and mint in a food processor and pulse until mint is finely chopped and incorporated into the sugar.
  4. Place eggs and mint sugar in a large bowl and whisk together well.
  5. Gradually whisk in chocolate/ butter mixture.
  6. Whisk in flour, salt, and bourbon.
  7. Pour into a lightly greased 9X13-inch pan. Bake 25-28 minutes. Let cool before frosting.
  8. To make frosting, melt chocolate in a small, heavy bottomed saucepan over low heat. Let cool for 5-10 minutes.
  9. Using an electric mixer, beat butter and sugar together. Add 3 tablespoons milk and beat, stopping to scrape down the sides, until smooth.
  10. With mixer on low, slowly add chocolate and then beat on medium until mixed well.
  11. Mix in vanilla extract and salt and add an extra tablespoon of milk if frosting is too thick.
  12. Spread frosting on brownies.
Mint Julep Brownies

Homemade Seed Paper

SeedPaper

Seed paper is a beautiful and thoughtful way to share gardening with your friends and family. Whether it is used to make cards, gift tags, or other crafts, it is a sentiment that is most appreciated when torn up and buried in the earth!

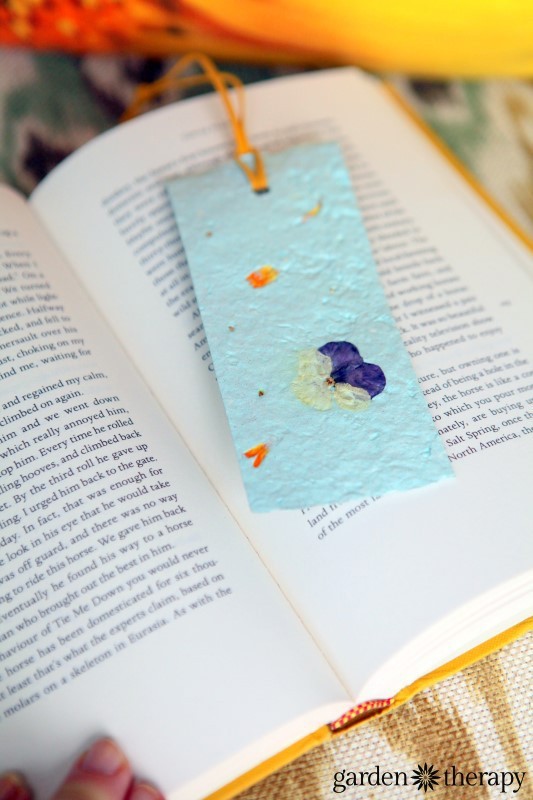
Seed paper is made by using traditional papermaking techniques, during which seeds are embedded. Use handmade seed paper as you would any other craft paper: to make cards, gift tags, wrapping paper, bookmarks, envelopes, bows, or flowers. This disposable gift doesn’t just get tossed in the garbage after it has served its decorative purpose; instead it gets planted and begins a new life as flowers, vegetables, or herbs. The garden that seed paper grows will be enjoyed year after year, creating beauty and nourishing those who receive it.

Materials

Two artist canvases, with wood frames at least 1″ thick
Window screen
Scissors
Utility knife
Staple gun
Shredded paper (see Note)
Blender (an old blender or a dedicated craft blender is best)
Plastic tub large enough to comfortably fit the frames inside
Sponge
Seeds
Decorative items (optional)
Towel
Nonstick surface (such as granite, glass, Plexiglass, or silicone)

Note: What paper makes the best paper? Try using these items: shredded bills and junk mail; gift wrap and tissue paper; printer paper, magazines, and newspapers; toilet tissue, paper towels, and napkins; paper bags and nonwaxed cardboard packaging; card stock and construction paper.

Instructions

To make paper with a uniform thickness and size, you first need to make a papermaking mold and deckle. Remove the canvas from both the artist canvases, leaving two wooden frames. Cut the window screen so that it is larger than the wood frame, wrap it around the edges of one of the frames, and staple in place. Pull the screen quite taut around the frame while stapling. You will end up with one frame with a firm screen across the front (mold) and another wood frame the same size (deckle). With the mold on the bottom (screen mesh side up) and the deckle on top, you have made your very own papermaking screen. (Photos 1, 2, 3)

Grab a handful of shredded paper including some bits of tissue paper, craft paper, wrapping paper, or whatever paper you can find with some dye in it. Add the paper to the blender so that it is one half to two-thirds full when gently compacted. Fill the blender to the fill line with warm water and let it sit for an hour or until the paper breaks apart easily when touched. A thicker-weight paper will take longer to soften than tissue paper.

When the paper is thoroughly softened, whir it in the blender until you have a thick, pulpy slurry. (Photos 4, 5, 6)

Fill the plastic tub with enough warm water to allow the mold and deckle to be submerged. Now float the papermaking screen in the water, deckle side  up. (Photo 7)

While holding the mold and deckle together, pour the slurry onto the screen (Photo 8)

Swish and wiggle the mold in the water to level the slurry and achieve about a one-quarter-inch thickness. Keep the top frame of the deckle out of the water so the slurry doesn’t spill into the tub.

Now is the time to add your seeds and decorative elements. Sprinkle seeds on the level slurry, gently press them in, and cover them up with some of the pulp. If you accidentally create a hole in the paper, wiggle it in the water to once again create a uniform thickness. Be creative in decorating your paper. The best items to use are flat and light such as flower petals, leaves, or grasses; seed catalogs and magazines (torn into smaller pieces); foil or glittery wrapping paper (torn into smaller pieces); waxed paper products like milk cartons and coffee cups; string or yarn; dryer lint. (Photos 9, 10, 11)

Hold both sides of the frame and slowly lift it from the water, allowing excess water to drain. Remove the deckle, turn the screen over, and press (paper side down) onto a smooth nonstick surface. Sponge away the moisture by pressing down on the back of the screen and squeezing the sponge out into the tub. (Photos 12, 13)

Repeat until not much moisture remains on the sponge. Gently remove the screen, leaving the paper on the nonstick surface. (Photo 14)

Gently shape and clean up the edges with the sponge, then set the paper aside somewhere that it will be undisturbed while drying, which could take up to a few days.

When the paper has dried, the edges may have curled. To flatten, simply stack all the dry sheets under a heavy pile of books and leave for a few days.

Making Paper Roses

To make these cheerful paper roses, cut the paper into a circle. Cut the spiral into the circle without cutting through to the end. Begin the spiral with a fairly thin width (about a quarter of an inch) and gradually get thicker. Don’t worry if the cuts aren’t uniform; a varying thickness along the spiral will just add to the organic appearance of the petals. Leave a 1 1/2 inch diameter circle in the center of the spiral.

Roll the spiral around itself starting at the outside edge continuing all the way to the center.

Add a few dabs of nontoxic glue where needed to hold the rose petals in place.

Planting Instructions

If you have made paper roses, they can be planted directly in the soil as is. For larger sheets of paper, tear them into half-inch pieces and scatter them on moist soil. Cover with a thin layer of soil and water. Keep moist until the seedlings emerge, then care for them as instructed on the seed packet. Seed paper can be grown in pots or directly in the garden. The instructions on the seed packet will be the same for seed paper, although for some types of seeds germination rates may be lower. Generally the seeds are placed in the wet paper pulp briefly, so this shouldn’t damage the seed as long as the paper is stored in a dry location and used within a relatively short period of time. Germination rates decline as seeds age so it’s best to use them within the year they were purchased.


Garden Made: A Year of Seasonal Projects to Beautify Your Garden & Your Life by Stephanie Rose


Homemade Seed Paper

Valentine’s Day Flowers

ValentineFlyer

View all arrangements on our website.

Valentine’s Day Flowers

The Bloody Doctor

BloodyDoctor

Makes 1 serving

Here is a barbecue man’s version of the classic Bloody Mary.

Ingredients
End Zone Barbecue Rub, as needed
¼ fresh lemon
Ice cubes
2 ounces vodka
6 ounces chilled tomato juice
2 ounces your favorite barbecue sauce
Celery stick, for garnish
1 cooked jumbo shrimp, for garnish

Instructions

Lay the rub on a saucer large enough for rimming the glass. Wet the rim of a large glass with the lemon. Fill the glass two thirds of the way with ice. Add the vodka, tomato juice, barbecue sauce, and the juice from the ¼ lemon. Mix well. Put the celery stick in the glass and hang the shrimp on the rim.


Find more recipes in The NFL Gameday Cookbook by Ray Lampe

The Bloody Doctor

End Zone Barbecue Rub

Makes about 1¼ cups

This rub is a little on the salty side, with a unique taste from the coffee. It can also be used in The Bloody Doctor recipe.

Ingredients
½ cup salt
½ cup packed brown sugar
2 tablespoons good-quality chili powder
1 tablespoon ground coffee
1 tablespoon lemon pepper

 Instructions

Combine the ingredients in a small bowl and mix well. Store in an airtight container for up to 1 month.


Find more recipes in The NFL Gameday Cookbook by Ray Lampe

Peachy Baby Back Ribs recipe


End Zone Barbecue Rub

Recipe – Peachy Baby Back Ribs

PeachyRibs

Makes 9 Servings

Everybody loves sweet, sticky barbecued ribs. These are a little different and served without barbecue sauce, but feel free to add some if you like. 

Ingredients
½ cup of your favorite barbecue rub
¼ cup turbinado sugar (Sugar in the Raw)
3 full slabs (about 2 pounds each) baby back ribs, back membrane removed
1½ cups peach preserves
6 tablespoons packed brown sugar
¾ cup apple juice

Instructions
1. Mix the rub and sugar together and sprinkle it on the ribs. Use about two-thirds on the meaty side and one-third on the boney side.

2. Prepare the grill for cooking over indirect low (300°F) heat, using peach wood or a combination of cherry and hickory for flavor.

3. Cook the ribs until they are nicely caramelized and looking great. This should take about 2 hours. Remove the ribs to a platter or sheet pan. Lay out 3 double-thick layers of heavy-duty aluminum foil, each big enough to wrap a whole slab. Transfer each slab of ribs to a piece of foil. Top each slab with ½ cup of the preserves. Sprinkle 2 tablespoons of brown sugar over each slab. As you fold each foil into a packet, pour ¼ cup of the juice in under the ribs. Seal the packets snugly, being careful not to puncture the foil with the rib bones. Return them to the grill for 45 minutes.

4. At this point, you could let the ribs cool down to finish later. This is a great way to take the ribs to a game-day party at a friend’s house or at the game. To reheat them, put the cooked ribs on a direct medium-hot grill. Cook and flip them for just a few minutes, until they are warm and caramelized. Cut each slab into 3 pieces and serve.


Find more recipes in The NFL Gameday Cookbook by Ray Lampe

The Bloody Doctor recipe

Recipe – Peachy Baby Back Ribs

Recipe – Rosemary Lemon Roasted Turkey

RoastedTurkey.jpg

An elegant Thanksgiving dinner

6 sprigs rosemary

3 lemons, cut into fourths
12- to 14-pound turkey
2 tablespoons vegetable oil
1 teaspoon garlic salt
1. Heat oven to 325°. Place rosemary and lemon fourths in cavity of turkey. Place turkey, breast side up, on rack in shallow roasting pan. Brush with oil. Sprinkle with garlic salt.
2. Bake uncovered 3 hours 30 minutes to 4 hours or until thermometer reads 180° and juice of turkey is no longer pink when center of thigh is cut. Let stand 15 minutes before serving.

Recipe from Betty Crocker

Recipe – Rosemary Lemon Roasted Turkey

Recipe – Rosemary-Cranberry Mulled Cider

rosemarycranberry

Your house will smell amazing when you cook this!

Serves 8

8 cups apple cider
1/4 cup honey
1 orange
2 tbsp whole cloves
1 cup cranberriers
2 5-inch cinnamon sticks
3 5-inch fresh rosemary sprigs
Additional rosemary and fresh cranberries for garnish, if desired

1. Pour apple cider into a 2.5 quart or larger crock pot or other slow cooker. Stir in honey. It may remain clumpy; that’s okay. It will dissolve when the mixture heats up.
2. With a toothpick, poke holes in the orange, about 1/2 inch to 1 inch apart. Carefully stick the cloves, pointy end down, into the holes. Add the orange to the cider along with the cranberries, cinnamon sticks, and rosemary. Push the rosemary down to help make sure it’s submerged.
3. Cook on low until hot and the cranberries have started to burst, 3-4 hours, taking care to not let the cider boil. Very carefully with a fork or masher, gently crush the remaining cranberries to pop them. They might splurt, so be careful! This will help to get as much flavor out of them without overcooking the cider.
4. Strain the mixture through a fine-mesh sieve into a large bowl. Add the strained cider back to the crock pot. You can also add the cinnamon sticks and orange back, as well, for a festive touch. Discard the remaining solids. Serve immediately or keep the crock pot on the warm setting to keep the cider hot.
5. Garnish individual mugs of cider with additional fresh rosemary sprigs and fresh cranberries, if desired.

The strained mulled cider can be refrigerated overnight. Reheat before serving.

You can also add Chardonnay or a dark rum for spiked flavor.

Try this delicious drink at our Open House on November 14 & 15.

Recipe – Rosemary-Cranberry Mulled Cider